Residents Page
Service Enablement: Import CSV
Use the Import CSV subpage of the Residents page to import information about residents, enabling their Wi-Fi service.
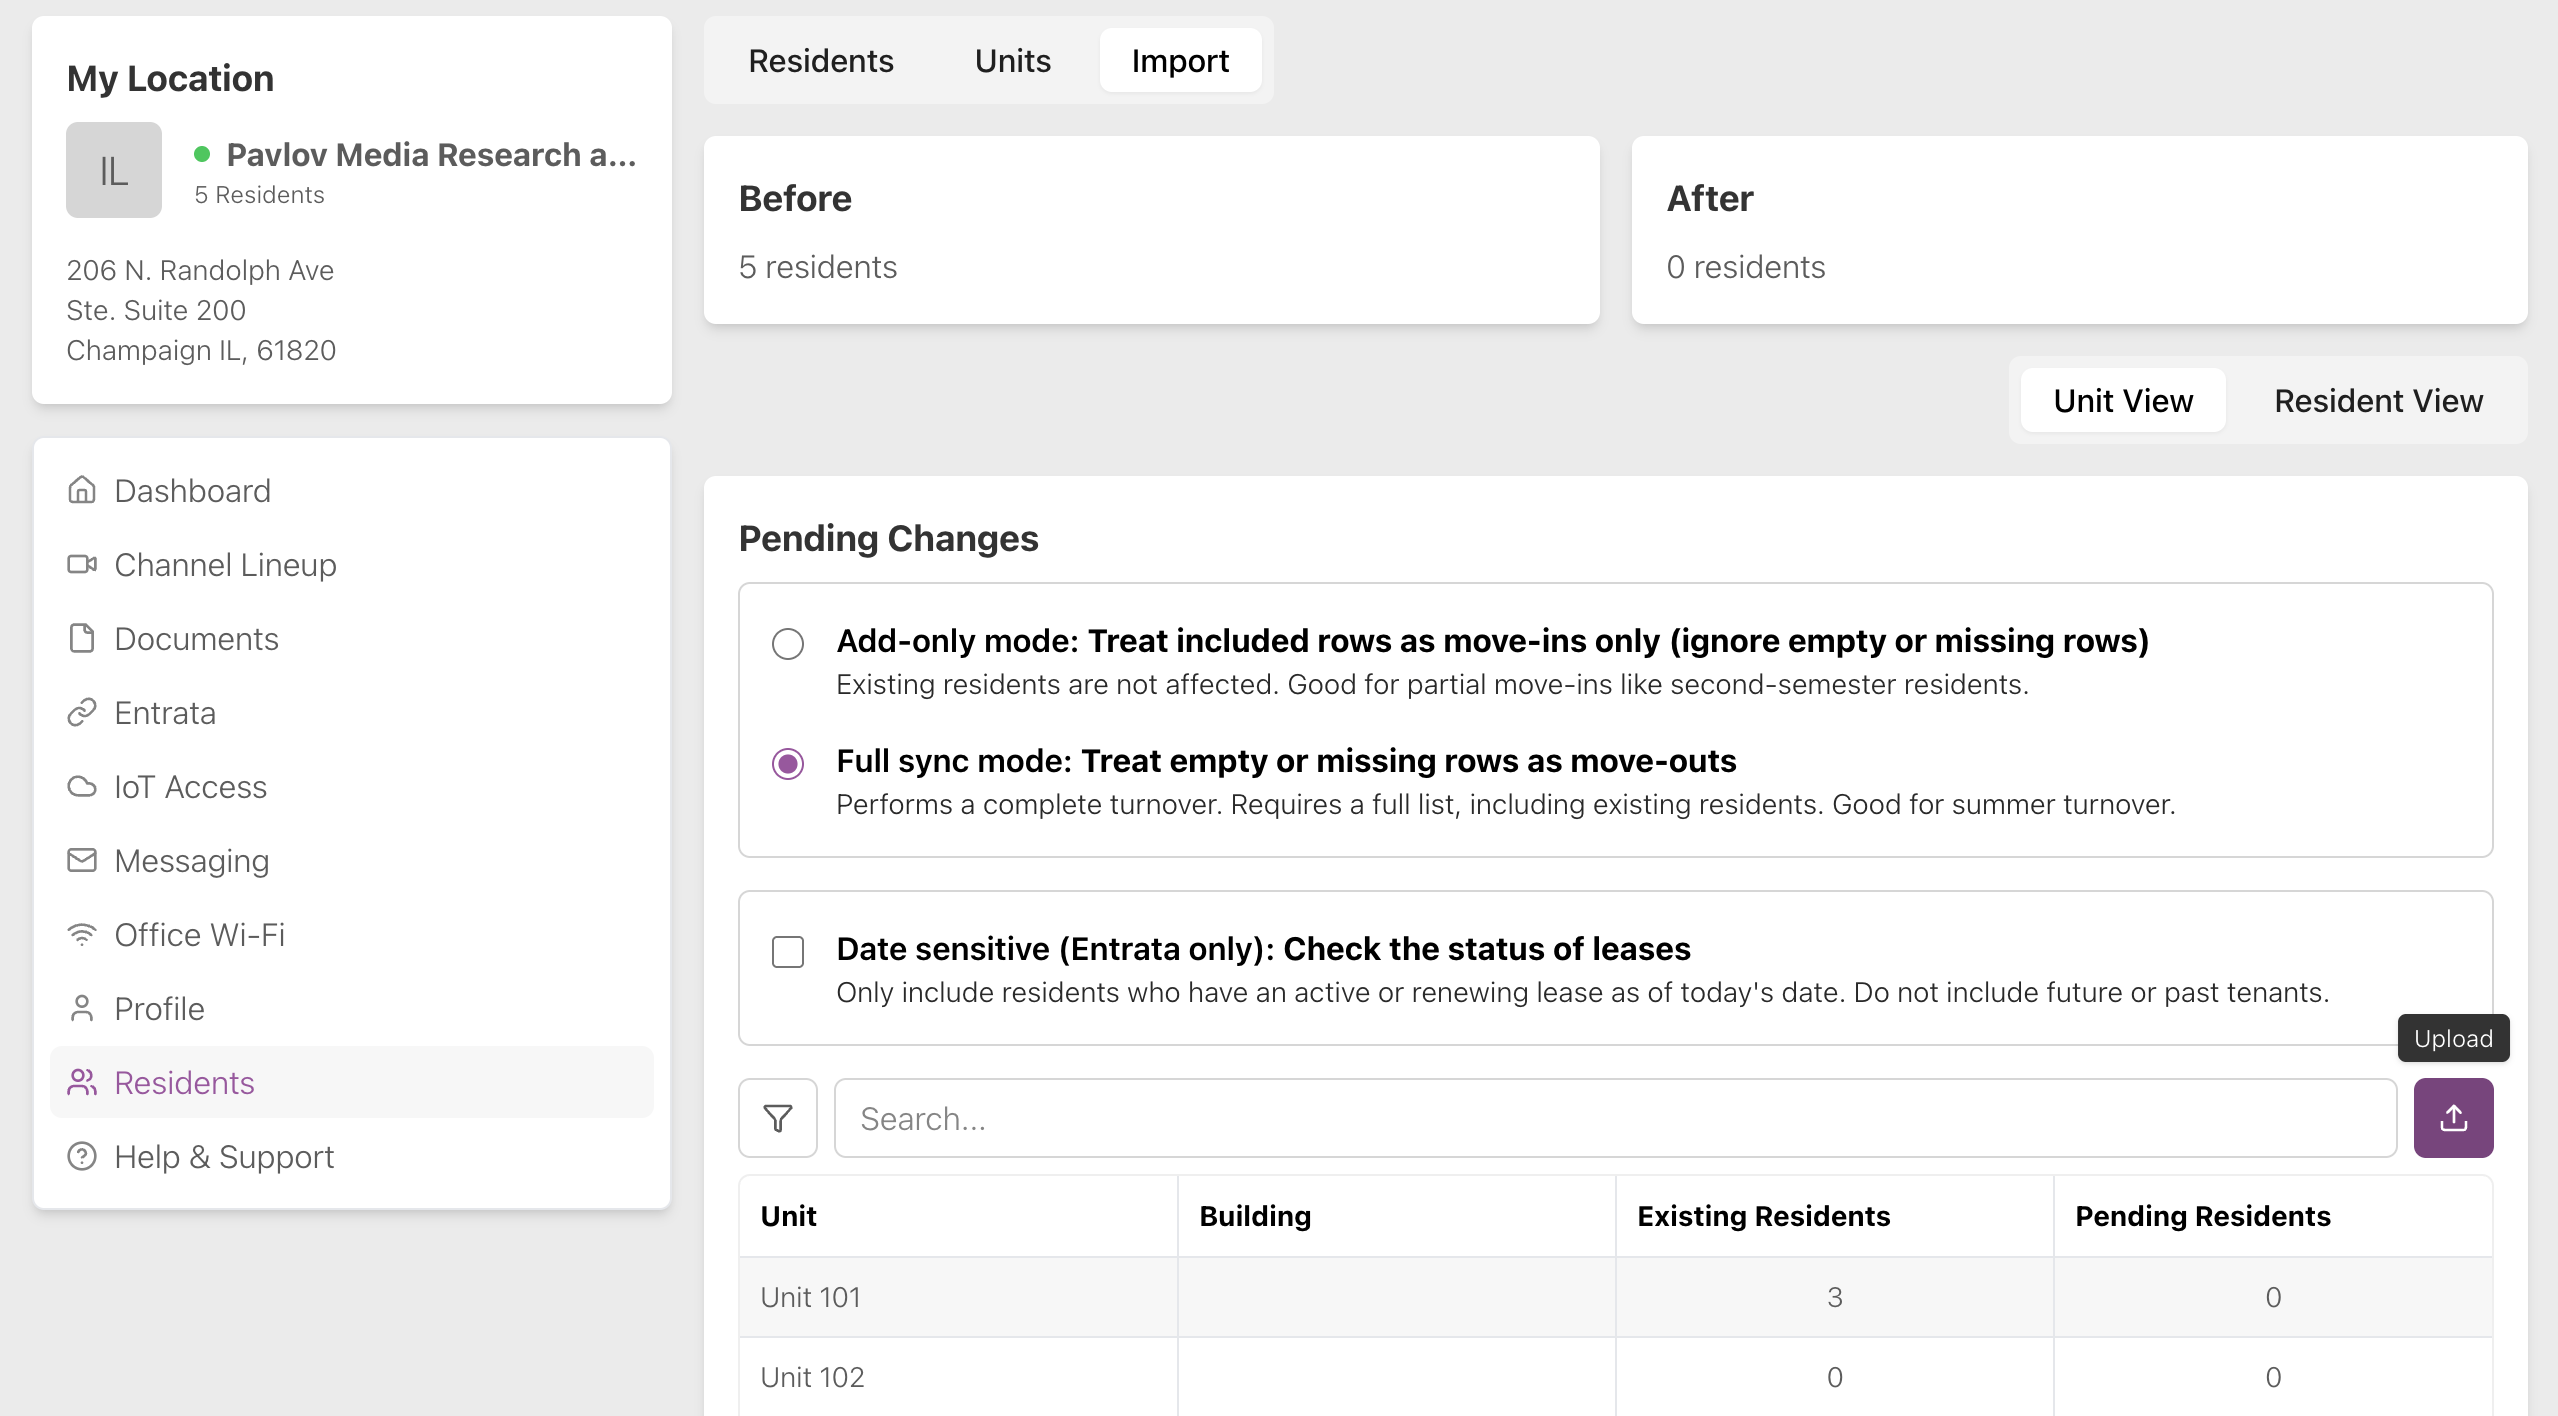
Click Upload to upload a CSV file containing residents’ information to enable service. You can do this with either Unit View or Resident View selected, it doesn’t affect the format of the CSV.
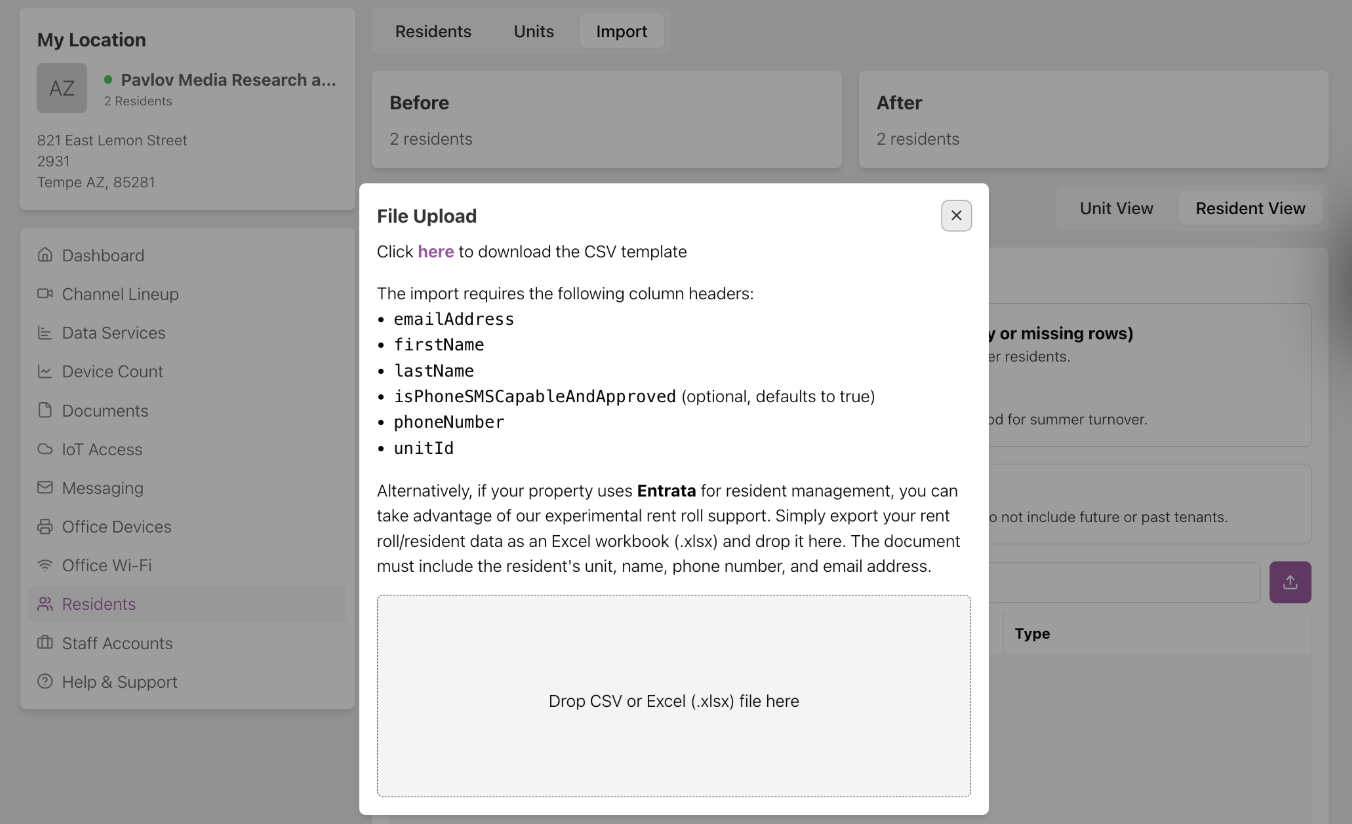
You can click “here” on the File Upload modal that appears when you click Upload to download a CSV template pre-populated with the current residents and units, so you can upload it with whatever updates you need to make from your new rent roll.
CSV Format Requirements
The CSV import requires the following column headers:
emailAddressfirstNamelastNameisPhoneSMSCapableAndApproved(optional, defaults to TRUE unless there is a column in the document with the same name that says otherwise)phoneNumberunitId(must match Pebbles ID, contact Pavlov support)
Alternatively, the following can be used with the following rules applied:
Unit
Instead of unitId, the following labels are valid unit headers:
Bldg-UnitUnit NameUnitUnit#Unit #unitName
The unit is accepted in the following formats:
<building>-<unit>-<bed><building>-<unit><unit>
The unit will be checked against the units in Pebbles (Pavlov’s system) to find a match. If a building is provided in the entry, it must also match against the building to be valid.
Name
The following labels are valid name headers:
ResidentNameTenantFirst LastLease Item NameFirst NameANDLast NamefirstNameANDlastName
The name is accepted in the following formats:
<Last>, <First><First> <Last>
Several cleanup steps are done on the name, such as fixing capitalization, removing extra nickname parenthesis, and removing extra spaces.
Phone Number
The following labels are valid phone number headers:
Phone NumberPhone NumbersMobile Phone #Mobile Phone#Phone #Phone#PhonePrimary PhonephoneNumber
The phone is accepted if it contains 10 digits and is unique in the CSV. Phone numbers that are not 10 digits, such as international numbers, will be removed from the row and marked invalid. The phone number header is required, but the value is optional.
Email Address
The following labels are valid email headers:
EmailE-mailEmailsemailAddress
The email is accepted if it passes an email check and is unique in the CSV.
Manage Residents/Units
The Residents page shows you the status (if Wi-Fi access is active or blocked) of each resident, as well as their first and last name and the unit, bedroom and building they live in.
Toggle the Residents page to Units to view information about the units in your property, including building, unit, and resident info.
Actions
You can perform various actions with each resident or unit. Click the icon in the Actions column to access these actions.
Choose multiple residents or units at once and click Bulk Operations to perform any of these actions on a group of residents.
Enroll Residents
Click the plus icon (+) on the residents page or Enroll Residents + on the unit Actions menu to enroll a resident.
Type the resident’s first and last name, email address, phone number, and unit number. Check if you want alerts to be sent through SMS (text).
Sync Resident or Unit
Syncing with Entrata runs across your property every 30 minutes, but you can also trigger it manually for a particular resident. Click Sync Resident or Sync Unit to sync information about the resident, or residents in a unit, from Entrata manually. This will:
- (For Resident Actions) Get their current lease status and move out or transfer the resident if needed
- (For Unit Actions) Sync the lease status of each resident in the unit
- Status is shown by the light (green = successful, SKIP = no changes)
- Sync the resident’s information like email address, phone number, and bedroom name
- Give/remove Wi-Fi access as needed
This will not:
- Sync the resident when the resident has moved to another property
Send Personal Message
Click Send Personal Message to write an email to a resident from Pavlov Media (no reply). Choose additional recipients if desired. Give the email a subject and body and choose the date you wish it to be sent. Click Submit to send or schedule the email.
Click Send Personal Message to go off the Residents page and to the Messaging page of My Properties. Use this page to send messages to individuals or blast all residents in a property. Residents will not be able to view the emails of other residents.
Send Rent Block
One of the features Pavlov Media offers is the ability to temporarily block residents’ Wi-Fi access if you notice that their rent is late.
Click Send Rent Block to write an email to a resident from Pavlov Media (no reply) and block their Wi-Fi access.
Give the email a subject, optionally edit the suggested body, and choose the date you wish it to be sent. Click Submit to send or schedule the email and block access. Note that rent blocks are not finalized until 30 minutes after sending the email.
Click Send Rent Block to go off the Residents page and to the Messaging page of My Properties. Use this page to send messages to individuals or blast all residents in a property.
View Residents
Click View Residents to view the enrollment status, name, and bedroom name of each resident in a unit.
Unblock a Resident
Click Unblock in the Actions menu on the Residents page to unblock a resident from rent block, turning their Wi-Fi access back on.
Resend Wi-Fi Password
Click Resend Wi-Fi Password on the Residents page to resend the resident an email (and SMS, if enabled) containing their Wi-Fi SSID and PSK (personal password). This is helpful if the resident has trouble finding the original email or text.
Move Out Residents
Click Move Out to move out a resident or group of residents, turning off their Wi-Fi access.